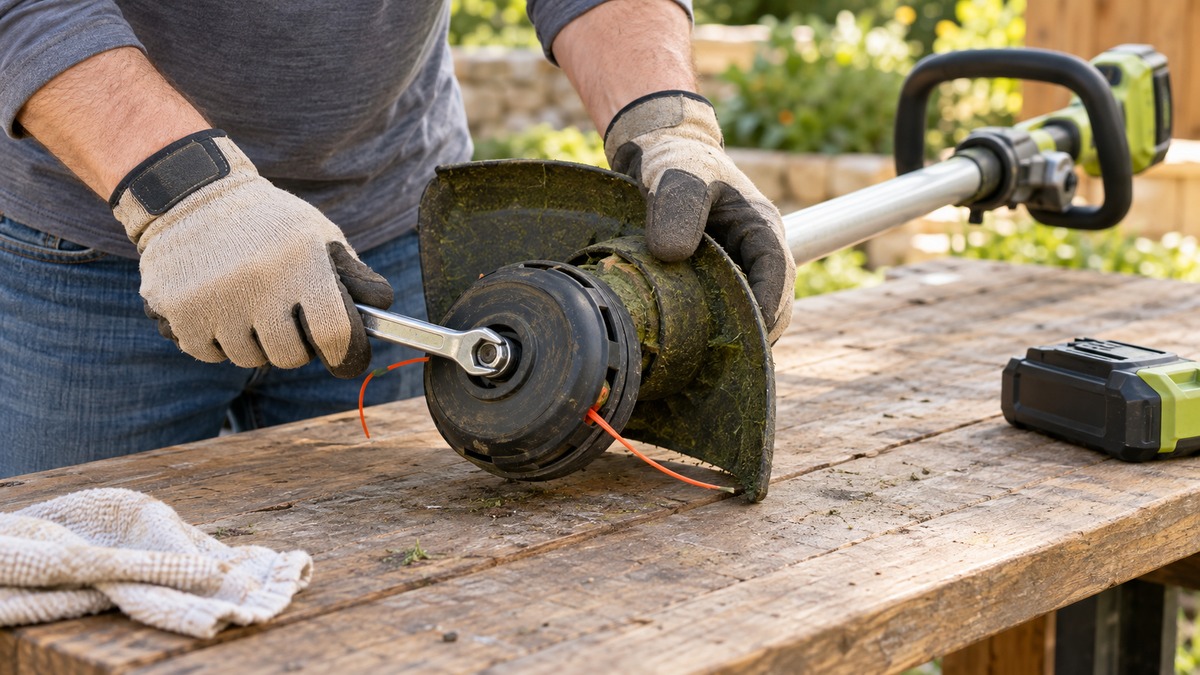
How to Remove a String Trimmer Head Safely
As an Amazon Associate we earn from qualifying purchases.
If you need to know how to remove string trimmer head safely, do the power step first: take the battery out of a battery trimmer, or turn off a petrol-powered product. Then follow the head steps the manufacturer gives for your head type. Husqvarna’s support article gives those steps for two head types, A15B and T35. The sources we opened give no removal steps for bump-feed heads, so this guide covers only the removal steps they do give.
Quick answer
- Take the battery out of a battery trimmer first. On a petrol trimmer, turn the product off. Husqvarna’s head replacement page says both.
- For the A15B and T35 heads, the steps run in order: lock the shaft, align the holes, then unscrew the head in the direction it rotates while running.
- On the T35 head, be sure not to misplace the drive disk. To install the new head, reverse the steps.
- The sources we opened give reload steps for bump-feed heads, not removal steps. Use your model’s manual for those.
Safety before you open the head
Turn the power off before you touch the head. For a battery trimmer, the Husqvarna head replacement page says: “If using the battery-powered product, take out the battery. If using the petrol-powered product, turn off the product.” The Husqvarna reload guide lists “Disconnect power (battery or spark plug)” under Before starting, and it adds “Work on a stable surface.” On a petrol unit, that wording points to the spark plug as the power step, and the head steps below still apply.
The OSHA eTool on power tools gives the same rule in general terms: “Disconnect tools when not in use, before servicing, and when changing accessories such as blades, bits, etc.” Removing a head is servicing, so the rule applies. The manufacturer’s head steps tell you what to do after that.
When a head needs to come off
The Husqvarna head replacement page starts with the reason a head comes off. It says: “While using your Husqvarna grass trimmer or brushcutter, the trimmer head can get damaged.” It adds that “This can occur if the product is affected by an impact that may produce a crack on the trimmer head.” In that case, “the trimmer head needs to be replaced.”
That is the case the removal steps are written for: a head that is damaged and needs replacing. A head that only needs new line is a reload job, and the sources treat it separately. For a bump-feed head, the Husqvarna Rapid Replace listing frames reloading as a way around taking the head apart: “Say goodbye to reloading frustrations from disassembling.”
Removal steps for the A15B and T35 heads
The Husqvarna head replacement page gives steps for two head types. Follow them in order, and check each detail against the diagram in your model’s manual before you apply force.
A15B head
- Make sure that the area around the trimmer head is clean.
- Lock the output shaft with a locking pin. Rotate the trimmer head to find the position where the holes align.
- Unscrew the trimmer head by rotating it in the direction it rotates while running.
To install the new head, put it in place and screw it in the opposite direction to the direction it rotates while running. Then pull out the locking pin.
T35 head
- If using the battery-powered product, take out the battery. If using the petrol-powered product, turn off the product.
- Lock the output shaft with a locking pin, then turn the head until the holes align.
- Turn the head in the direction it rotates while running to unscrew it. Be sure not to misplace the drive disk.
The page says to follow the above instructions in reverse order to install the new head.
If you are comparing battery string trimmers with a head like this, the DeWalt FlexVolt string trimmer post is the related page on this site. It is a product post, so use it for the product and not for the head steps.
Which head types the steps cover
The table shows which head types have removal steps in the sources we opened, and which have only reload steps. It is the quickest way to see whether your head is covered.
| Head or model | Steps in the sources we opened | Source |
|---|---|---|
| A15B head | Removal and installation steps | Husqvarna head replacement page |
| T35 head (battery or petrol) | Removal and reverse installation steps | Husqvarna head replacement page |
| T25 Tap ‘n’ Go head on the 122L | Reload steps only: align the arrows, feed the line, twist the bump knob | Husqvarna 122L page |
| Rapid Replace bump-feed head (general listing) | Reload steps only: align the eyelets, feed the line, twist | Husqvarna Rapid Replace page |
| Rapid Replace bump-feed head for 220iL and 320iL | Reload steps only: align, feed and twist | Husqvarna 220iL and 320iL page |
Bump-feed heads: what the sources cover
A bump-feed head is reloaded from the outside. The Husqvarna Rapid Replace listing describes the job as a quick reload, saying the head “takes seconds to restring.” The steps it gives are to “simply align the eyelets, feed the Rapid Replace head with .065” – .105” line, and twist.” The 220iL and 320iL listing uses the same three moves: “Align, feed and twist!” The 122L page reloads its T25 head by aligning the arrows and twisting the bump knob to wind the line inside the spool.
None of these pages gives removal steps. So do not apply the A15B or T35 steps to a bump-feed head unless your manual gives the same steps for that head. Check the lock point, the unscrewing direction and the parts order in the manual first.
Direction, locking and the drive disk
The Husqvarna head replacement page gives the unscrewing direction as the direction the head rotates while the trimmer runs. It gives that wording for both the A15B and the T35 steps. It does not use the words clockwise or counterclockwise, and the sources we opened give no direction for any other head.
The locking step uses a locking pin. The page does not describe the pin or say where it fits on each model, so check the manual for the lock point before you put any force on the head. On the T35 head, the page warns to be sure not to misplace the drive disk. Keep track of that part as you remove the head.
Mistakes to avoid
- Starting the head work with the battery in or the engine on. The Husqvarna page and reload guide both put the power step first.
- Turning the head in the wrong direction. The page gives the running direction, so confirm it against your manual before you force anything.
- Misplacing the drive disk on the T35 head. The page warns about it directly.
- Assuming a bump-feed head comes off the same way. The sources we opened give reload steps for those heads, not removal steps.
After the old head is off, the next job is the line. Check the approved diameter for the new head before you buy line, using the head limit in your manual or listing. For a Ryobi model, the Ryobi One+ weed eater string post covers that line. For changing the string on a Ryobi 40V trimmer, see changing the string on a Ryobi 40V trimmer.
How we chose
The six pages in the sources list are the ones this guide cites, and we opened each one on 2026-10-22. Five are Husqvarna pages: the head replacement article, the reload guide, the 122L page, and the two Rapid Replace listings. The sixth is the OSHA eTool on power tools, which gives the general rule for servicing power tools.
The removal steps come from one Husqvarna head replacement page. We chose it because it names head types and gives steps for each one, along with the battery and petrol power steps. The steps in this guide come from the written pages only. The manuals we found for other brands are PDF files that we could not open, so they are not used here.
What we could not verify
We could not verify removal steps for any bump-feed head. We could not verify the locking pin’s tool or its fit on any model, because the sources do not describe it. We could not verify the unscrewing direction for any head other than the A15B and T35 on the page. The sources we opened also do not give a torque or a tightness for reinstalling a head.
What the sources do not say
The sources we opened do not say how to tell which head your trimmer has, beyond checking the manual. They give no removal steps for bump-feed heads, and they do not describe the locking pin. They do not say how tight to reinstall the head. They give no removal sequence for any trimmer from a brand other than Husqvarna, and the page does not say which direction to turn the head on any model other than the two it covers.
FAQ
Do I need to take the battery out to change the head?
Yes, on a battery trimmer. The Husqvarna head replacement page says to take out the battery on the battery-powered product. The reload guide lists disconnecting power as the first step before starting.
What do I do if my trimmer is petrol-powered?
The head replacement page says to turn the product off on a petrol-powered product. The reload guide lists the spark plug as one of the ways to disconnect power, so disconnecting the spark plug is the matching step on a petrol unit. Then follow the head steps for your head type.
Which way do I turn the head to remove it?
On the A15B and T35 heads, the Husqvarna page says to unscrew the head in the direction it rotates while running. The page does not use the words clockwise or counterclockwise. Confirm the direction against the diagram in your model’s manual before you apply force.
Do I have to remove the head to reload a bump-feed trimmer?
The sources we opened describe reloading a bump-feed head without taking it apart. The Husqvarna Rapid Replace listing ties its reload to avoiding disassembly: “Say goodbye to reloading frustrations from disassembling.” Use the reload steps for your head, and use the manual if you need the head off for another reason.
Why does the page tell me to lock the shaft?
The page says to lock the output shaft with a locking pin, then rotate the head until the holes align. It does not explain why the lock is needed. Follow the step as written, and check the manual for the lock point on your model.
Is the OSHA rule enough on its own?
No. The OSHA eTool gives the general rule to disconnect tools before servicing. It does not give head steps for any trimmer. For the head steps, use the manufacturer’s manual for your model.
Bottom line
Take the battery out or turn the petrol unit off first, then follow the removal steps for your head type. If the head is a bump-feed type, use your manual, because the sources we opened give no removal steps for it.
Sources
- Husqvarna US Help Center: How to replace a trimmer head (opened 2026-10-22)
- Husqvarna US Help Center: How to reload a trimmer line (opened 2026-10-22)
- OSHA: eTool, Construction, Electrical Incidents, Power Tools (opened 2026-10-22)
- Husqvarna US: Husqvarna Rapid Replace Trimmer Head (opened 2026-10-22)
- Husqvarna US: Rapid Replace Trimmer head – 220iL and 320iL (opened 2026-10-22)
- Husqvarna US: 122L String Trimmer (opened 2026-10-22)