How to Replace an Electric Mower Blade Safely
As an Amazon Associate we earn from qualifying purchases.
Here is the short answer to how to replace electric lawn mower blade safely: take the battery and any safety key out first, put on gloves, block the blade so it cannot turn, loosen the bolt, fit the new blade the way your mower’s manual shows, and tighten it to the torque in that manual. This guide follows the steps that manufacturer and extension pages describe for battery mowers, quotes them, and says where those pages stay silent.
Quick answer
- Remove the battery and the red safety key first. If your mower has a safety key with a 0 position, turn it to 0, then wait before you touch the blade.
- Wear gloves, lay the mower on its side if your steps call for it, and block the blade with wood before you loosen the fastener.
- Fit the new blade with its angled end toward the cutting cover, line it up with the blade mount, and check that it is balanced.
- The pages we opened give no torque value for electric mower blade bolts, so use the figure in your owner’s manual.
Safety before the blade comes off
Battery removal comes before every other step. Illinois Extension says that for electric mowers you should remove the battery to prevent any accidental engagement of the blades. The ECHO product page applies the same logic to electric equipment: remove the battery or key to prevent accidental startup.
Husqvarna’s UK page gives the most specific sequence for battery mowers. It says to turn the safety key to 0, remove the battery and wait a minimum of 5 seconds to prevent accidental starts. Ryobi’s Australian article puts the same action first under its safety heading: remove the battery and the isolator or red safety key. Only the Husqvarna UK caution states the 5-second wait. The Illinois and ECHO pages give no wait time, so do not read the 5 seconds as a rule from every source. For what the battery numbers mean, see the guide to battery voltage and amp-hour ratings.
Gloves come next. ECHO says to wear cut-resistant gloves when handling blades, and Ryobi says to always wear protective gloves before any maintenance. The ECHO page also says that a mower tilted for access must be positioned securely to prevent tipping. Ryobi’s steps tilt the mower onto its side with the blade vertical for safe access.
Tools and parts to have ready
- Gloves and a block of wood. ECHO says to block the blade with a piece of wood when loosening the mounting bolt. Ryobi uses a wooden block to stop rotation while it removes the nut and again while it tightens the nut.
- A 15 mm spanner for the Ryobi model in its article. The pages we opened do not state a wrench size for other brands.
- A torque wrench, if your manual lists a torque value. Illinois Extension says to use one to tighten the bolt to the specifications in the user manual.
- The replacement blade and its hardware. Ryobi’s steps name a blade nut, a spacer and an insulator. Husqvarna’s UK steps name a blade bolt and a spring washer. Check which set your mower uses before you start. For Black and Decker blade options, see Black and Decker lawn mower blade options.
Step-by-step blade replacement
Work through these steps in order, with the battery out for every one. Each step names its page.
- Remove the battery and the safety key. Remove the red safety key and remove the battery, as Ryobi describes. If your model has a safety key with a 0 position, turn it to 0 first. Husqvarna’s UK caution then calls for a wait of at least 5 seconds. Keep the battery out until the last step is finished, because the Illinois page ties battery removal to preventing accidental engagement of the blades.
- Put on gloves. Wear cut-resistant gloves when you handle blades, as ECHO advises. Ryobi says to always wear protective gloves before any maintenance.
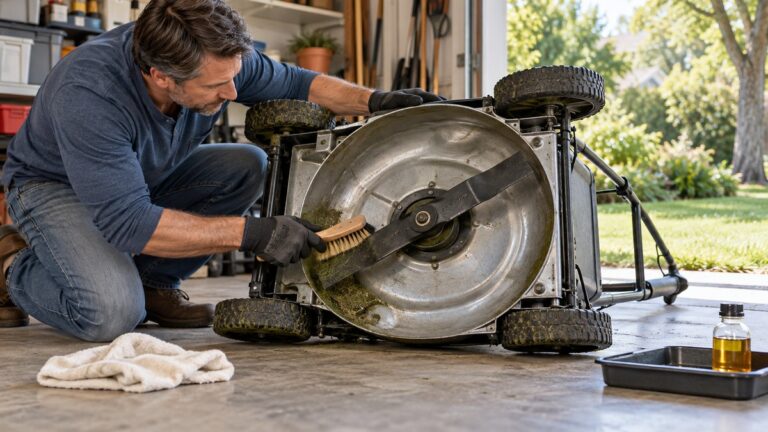
- Clean the blade area and set the mower. Wipe away dirt, grass and debris around the blade with a soft cloth or brush, as Ryobi describes. Then carefully tilt the mower onto its side with the blade vertical for safe access, and make sure it is positioned securely to prevent tipping.
- Block the blade. Place a wooden block between the blade and the cutting deck to stop blade rotation, as Ryobi shows. Husqvarna’s UK page gives the same instruction.
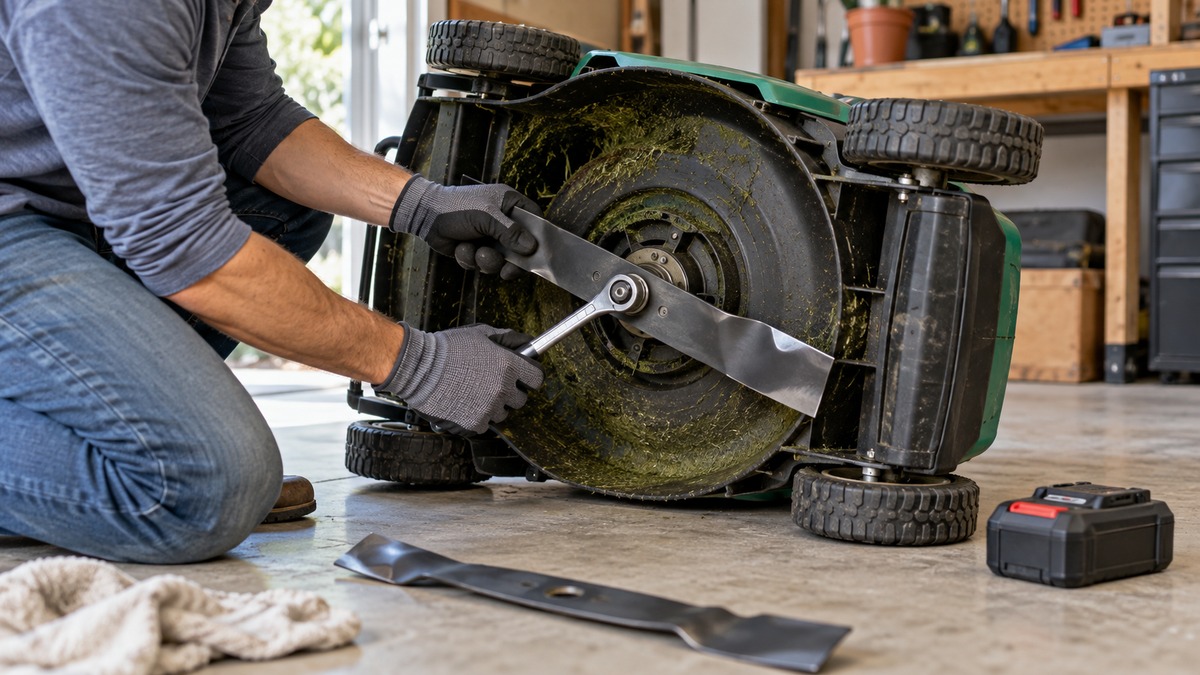
- Brace the blade and loosen the fastener. Brace the blade with a board, brick or metal pipe and remove the bolt holding it in place, as Illinois Extension describes. Ryobi calls the fastener a nut and uses a 15 mm spanner to remove the nut, spacer, insulator and blade. Husqvarna’s UK page says to remove the blade bolt and spring washer.
- Inspect the old blade and mounting parts. Look at the blade to check if it is damaged or blunt. Check the cutting equipment for damage or cracks and always replace damaged cutting equipment, as the Husqvarna UK page says. Check the blade support and blade bolt for damage, and check that the engine shaft is not bent.
- Fit the new blade. Align the new blade with the cut-outs on the blade mount, as Ryobi’s steps show. When you attach the new blade, point its angled end in the direction of the cutting cover and make sure it is aligned with the centre of the engine shaft, following the Husqvarna UK page. Replace the insulator and spacer in their correct positions, as Ryobi describes.
- Check the balance. Husqvarna’s US support page says it is necessary to balance blades after they are replaced or sharpened. It also says a blade not attached correctly after replacement can become unbalanced and cause vibration. The balance section below lists what the sources describe.
- Tighten with the block in place. Use the wooden block again to prevent rotation and tighten the blade nut with the 15 mm spanner, as Ryobi describes. Husqvarna’s UK page says to attach the spring washer and tighten the bolt and washer with a torque specific for your mower, found in the operator’s manual.
- Turn the blade by hand. Pull the blade around by hand and make sure that it turns freely, as the Husqvarna UK page directs. The sources we opened do not say what to do if it does not turn freely.
What each source says about the job
The table puts each point beside the page it comes from. A cell that says not stated means the cited page does not give that detail.
| Step | What the source says | Source |
|---|---|---|
| Battery out before blade work | For electric mowers, remove the battery to prevent accidental engagement of the blades | Illinois Extension |
| Safety key and wait | Turn the safety key to 0, remove the battery, wait a minimum 5 seconds (battery-powered mowers) | Husqvarna UK |
| Gloves | Wear cut-resistant gloves when handling blades; wear protective gloves before any maintenance | ECHO; Ryobi |
| Block the blade | Wooden block between blade and deck; block the blade when loosening the mounting bolt | Ryobi; Husqvarna UK; ECHO |
| Wrench size | 15 mm spanner for the Ryobi model; not stated for other brands | Ryobi |
| Torque value | Not stated; use the torque listed in the owner’s manual | Illinois Extension; Husqvarna UK |
| Fastener set | Blade bolt with spring washer (Husqvarna UK); blade nut, spacer and insulator (Ryobi) | Husqvarna UK; Ryobi |
| Blade orientation | Angled end of the blade toward the cutting cover | Husqvarna UK |
| Mount alignment | Align the new blade with the cut-outs on the blade mount | Ryobi |
| Balance check | Balance blades after they are replaced or sharpened | Husqvarna US support |
| Replacement interval | Every 12 months, as general guidance from Ryobi | Ryobi |
Each row comes from one page, and none of the pages covers every brand. Treat the table as a checklist to compare against your own manual.
Torque and fastener details
Torque is the figure most readers look for, and the pages we opened do not give one for an electric mower blade bolt. Illinois Extension and Husqvarna’s UK page both point to the operator’s manual. The Ryobi article gives a wrench size and a tightening step, but no torque figure.
The hardware differs between pages. Husqvarna’s UK steps include a spring washer, while Ryobi’s steps name a nut, a spacer and an insulator. Match the set that came off your mower.
How often to replace the blade
Ryobi’s Australian guidance says you should replace mower blades every 12 months to maintain optimal cutting performance, and to inspect them regularly for chips or dents. The same article gives the reason: sharp, new blades ensure a cleaner cut and reduce strain on the mower’s motor.
That interval comes from Ryobi only. If the battery will not charge after blade work, see the guide to a lawn mower battery that will not charge.
Common mistakes to avoid
- Working with the battery still in. Illinois Extension ties battery removal to preventing accidental engagement of the blades.
- Skipping the wait. Husqvarna’s UK caution asks for a minimum of 5 seconds after the battery is removed.
- Fitting the blade the wrong way round. The Husqvarna UK page says to point the angled end toward the cutting cover.
- Reusing a damaged blade. The Husqvarna UK page says to replace damaged cutting equipment, and Ryobi says to inspect for chips or dents.
- Skipping the balance check. Husqvarna’s US support page says balance is necessary after a blade is replaced or sharpened.
- Guessing the torque. Without a number from your manual, the cited pages offer no value to use.
How we chose
We looked for manufacturer support pages and university extension pages that describe blade removal, fitting or safety. Retail pages, blogs and forum posts were left out. Six pages are cited, each opened with the fetch step on 2026-10-22 and each quoted from the saved page text. Three are US pages: University of Illinois Extension, ECHO’s product page and Husqvarna’s US support page. Husqvarna’s UK page and Ryobi’s two Australian articles are not US pages.
The non-US pages were needed because the US pages we opened cover battery removal, the wood block and the balance check, but they do not list the blade-fitting steps in order. The Ryobi and Husqvarna UK pages do. Where a non-US page supplies a step, the text names it.
What we could not verify
- A torque figure for an electric mower blade bolt. None of the cited pages gives one.
- Whether the Ryobi steps match your model. The article lists the models it covers, and the sources do not say the steps carry over to other brands.
- The wrench size for brands other than Ryobi.
- Which face of the blade is the cutting edge on your model. The Husqvarna UK page describes the angled end, and the sources we opened do not describe a marking for every mower.
What the sources do not say
The sources we opened do not say when to reconnect the battery after the work is finished. They do not explain what to do if a bolt will not loosen with the block in place. The Husqvarna UK page tells you to make sure the blade turns freely, but it does not say what to do if it does not.
The pages also give no torque value, no wrench size for most brands and no replacement interval for most brands. They do not explain how to choose a replacement blade beyond the models the Ryobi article lists.
FAQ
Do I have to remove the battery before changing a mower blade?
For an electric mower, yes. Illinois Extension says the battery should come out to prevent accidental engagement of the blades, and the ECHO page says to remove the battery or key on electric equipment to prevent accidental startup.
Husqvarna’s UK page adds the detail for battery-powered mowers: turn the safety key to 0, remove the battery, and wait a minimum of 5 seconds before you work near the blade.
Why do I need a block of wood?
The block holds the blade still while you loosen or tighten the fastener. Ryobi uses a wooden block to stop rotation while removing the nut and again while tightening it, and Husqvarna’s UK page says to prevent the blade from moving with a block of wood.
What torque should the blade bolt be?
The pages we opened do not give a torque value for electric mower blade bolts. Illinois Extension and Husqvarna’s UK page both say to use the torque listed in the owner’s manual, so use that figure. If your manual gives none, the pages we opened do not say what to do next.
Which way should the new blade face?
Husqvarna’s UK page says to point the angled end of the blade in the direction of the cutting cover. Ryobi’s article says to align the new blade with the cut-outs on the blade mount. The sources we opened do not describe a marking on the blade that shows direction for every mower, so confirm the direction with your manual.
How often should I replace the blade?
Ryobi’s Australian guidance says every 12 months, plus regular inspection for chips or dents. The pages we opened give that interval for Ryobi only. For a damaged blade, the Husqvarna UK page says to always replace it.
Can I follow these steps without my manual?
The steps here come from specific models and general guidance, so the pages we opened do not say they apply to every battery mower. Illinois Extension and Husqvarna’s UK page both point to the manual for details such as torque, so check yours before you start.
Bottom line
If the battery is still in the mower, do not touch the blade. Take the battery and any safety key out, wait, block the blade, and fit the new blade with its angled end toward the cutting cover. Use the torque in your own manual, because none of the pages we opened give a number for electric mower blade bolts.
Sources
- University of Illinois Extension: Mower Maintenance (opened 2026-10-22)
- ECHO: How to Balance Lawn Mower Blades Properly (opened 2026-10-22)
- Husqvarna US support: Why is there excessive vibration while using my lawn mower? (opened 2026-10-22)
- Husqvarna UK: How to check and replace a lawn mower blade (opened 2026-10-22)
- Ryobi Australia support: How to change your Ryobi Lawn Mower Blade? (opened 2026-10-22)
- Ryobi Australia support: When to change RYOBI Lawn Mower blades (opened 2026-10-22)